DYAN a écrit :ok vient de lire
Et pour les amortisseurs doit on monter ceux de la Clio RS ou ceux de la Williams
Dyan
rs largeur de pivot (la ou vient se fixer les amortos) differents, si tu veux monter ceux de willy va falloir usiner.

DYAN a écrit :ok vient de lire
Et pour les amortisseurs doit on monter ceux de la Clio RS ou ceux de la Williams
Dyan

Bruno idt+ a écrit :Tiens :
f0xy a écrit :Thought I would write a bit of a guide on this as there seems to be alot of questions popping up about fitting the widetrack from a 172/182 to a Mk1 Clio (Valver, Williams, etc)...
When I attempted to fit it to mine back in October 2008, there wasnt much information about it, so I ended up doing it blind, as far as I could find only one other person had done it and that car was now scrapped!
Ive seen alot of threads on the internet about it, some correct information with quite a bit of incorrect information too! Anyway, on with the guide...
Williams Widetrack Information
As you probably know, the Williams has a wider track than a Valver and other Mk1s as standard, which alot of people talk about. The Williams track is 34mm wider overall, and also runs with a thicker anti roll bar, which all improves the handling.
172 Widetrack Information
Now that there are quite a few people that have successfully fitted the 172 widetrack to their Mk1, we know that it is actually wider than the Williams widetrack. We are unsure of the actual figure, but it is at least 10mm overall, if not more!
The other advantage of running 172 widetrack is you get the larger brake setup (280mm disks over 259mm). Plus with the 172 brake setup you have a lot more options for aftermarket brakes (4pots, 6pots, etc), especially when they come up second hand.
Please Note: -----------------------------------------------------------------
The guide is based on fitting the 172 widetrack to a Valver, with regards to parts required and procedure. Its also worth noting that everything fits to a Valver or Williams subframe perfectly fine. Fitting it to a Williams would be the same, apart from you would keep the Williams shock absorbers and Williams anti roll bar.
----------------------------------------------------------------------------------
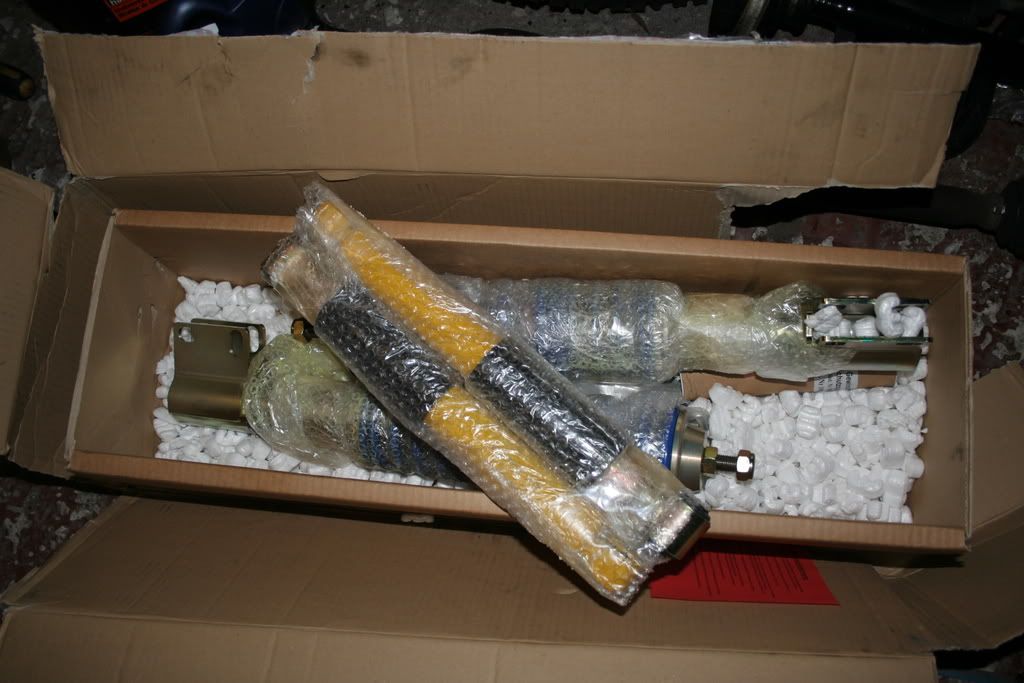
Parts Required
Parts That Dont Fit
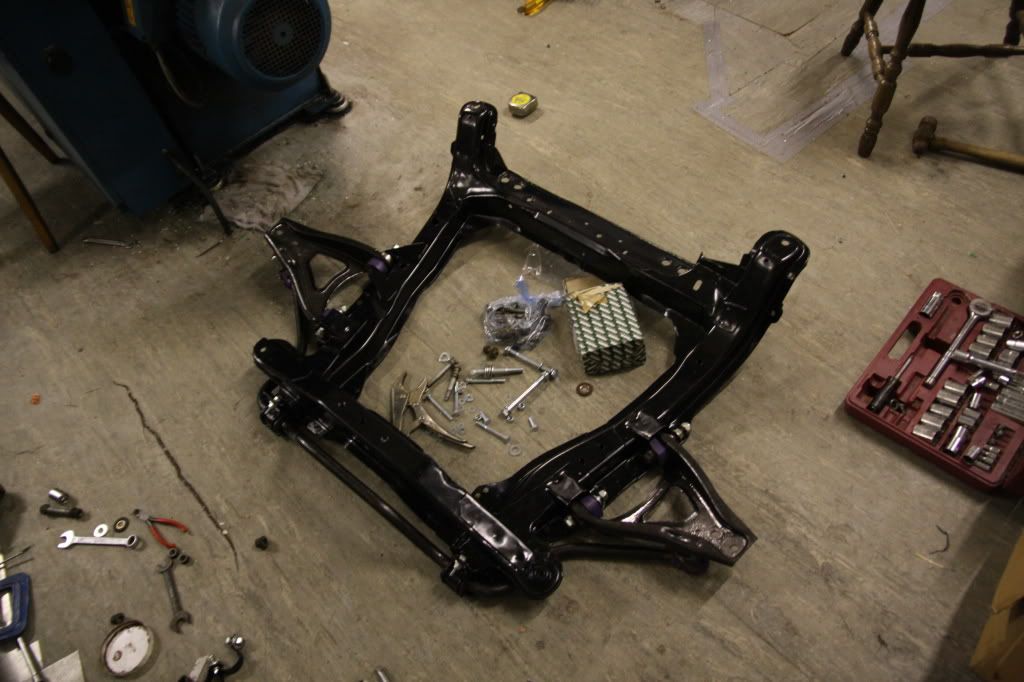
- 172 Ph1, Ph2 or 182 Wishbones [Picture]
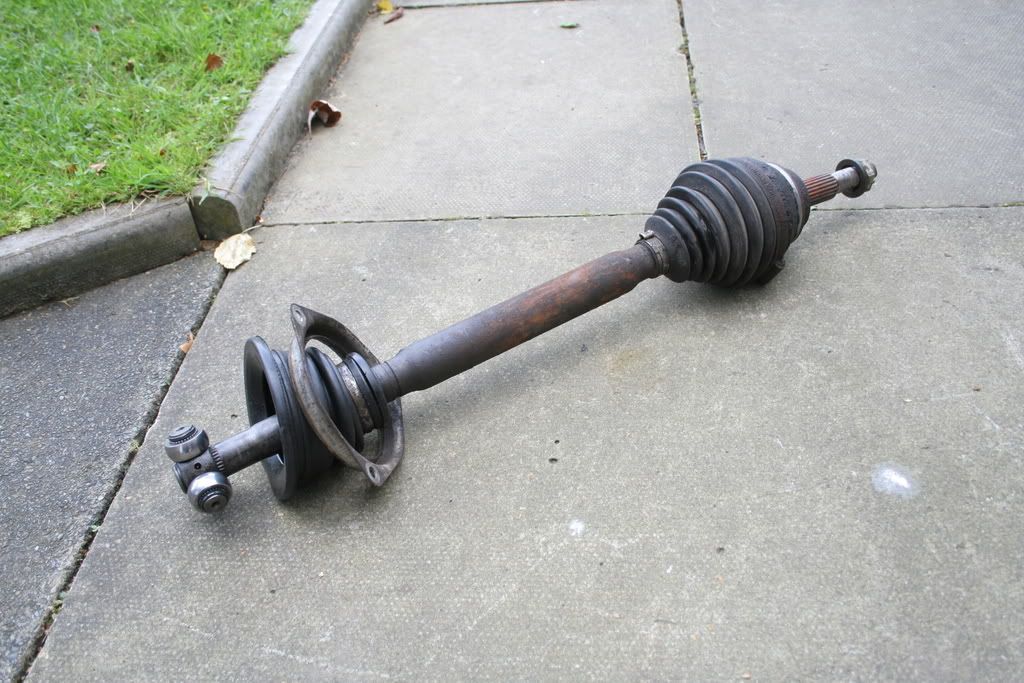
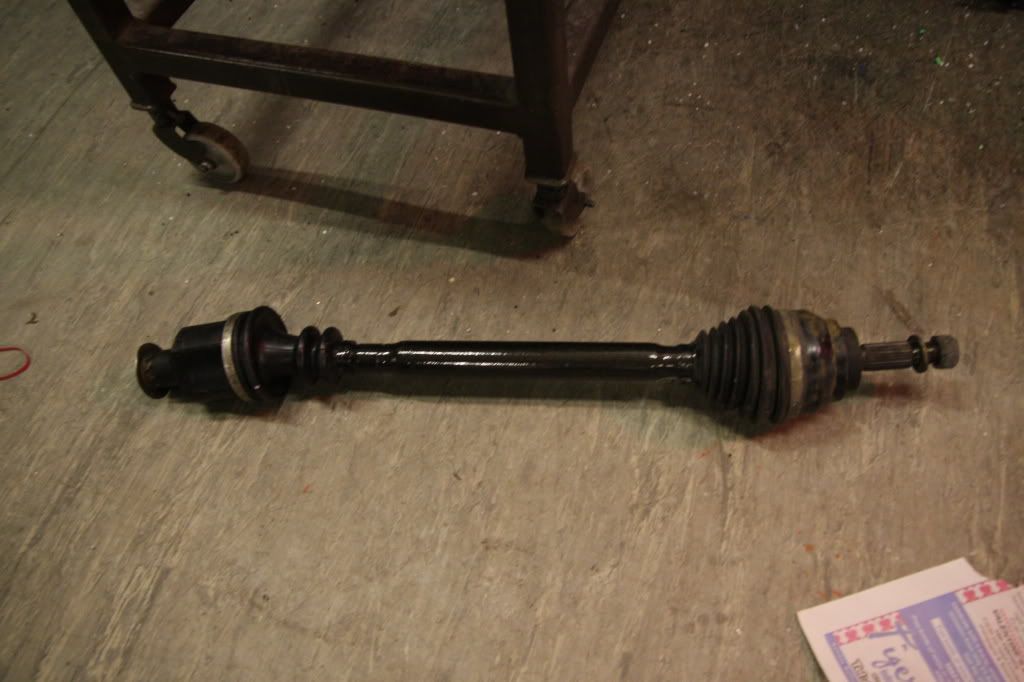
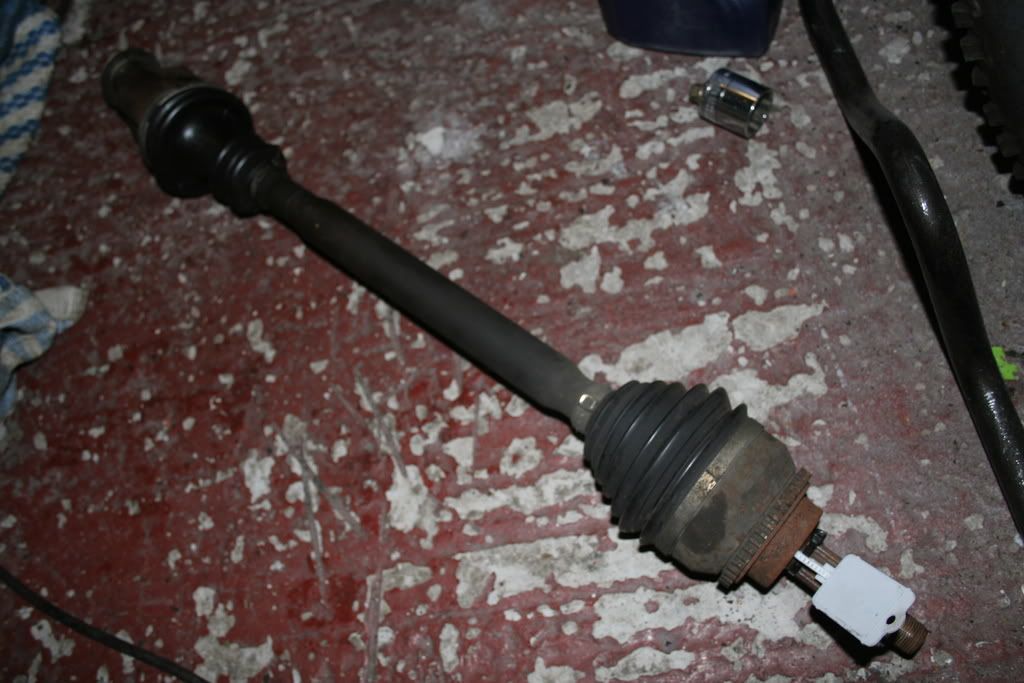
- 172 Ph1 or Ph2 Driveshafts [Picture: Nearside Offside]
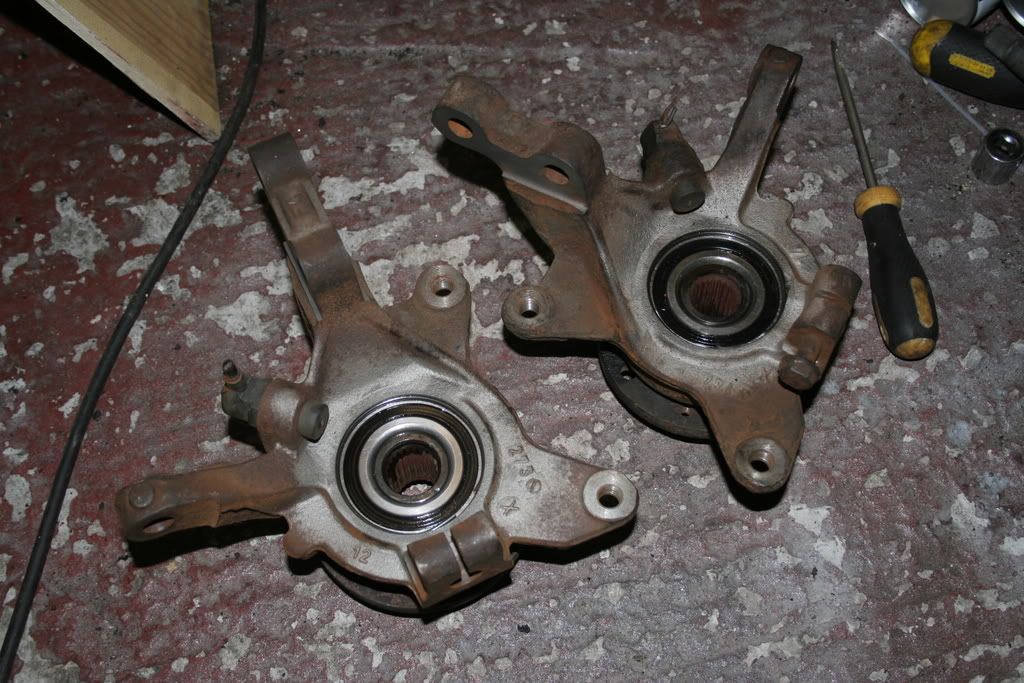
- 172 Ph1, Ph2 or 182 Non-Cup Pack Hubs (Bolt Spacing Has To Be 54mm) [Picture]
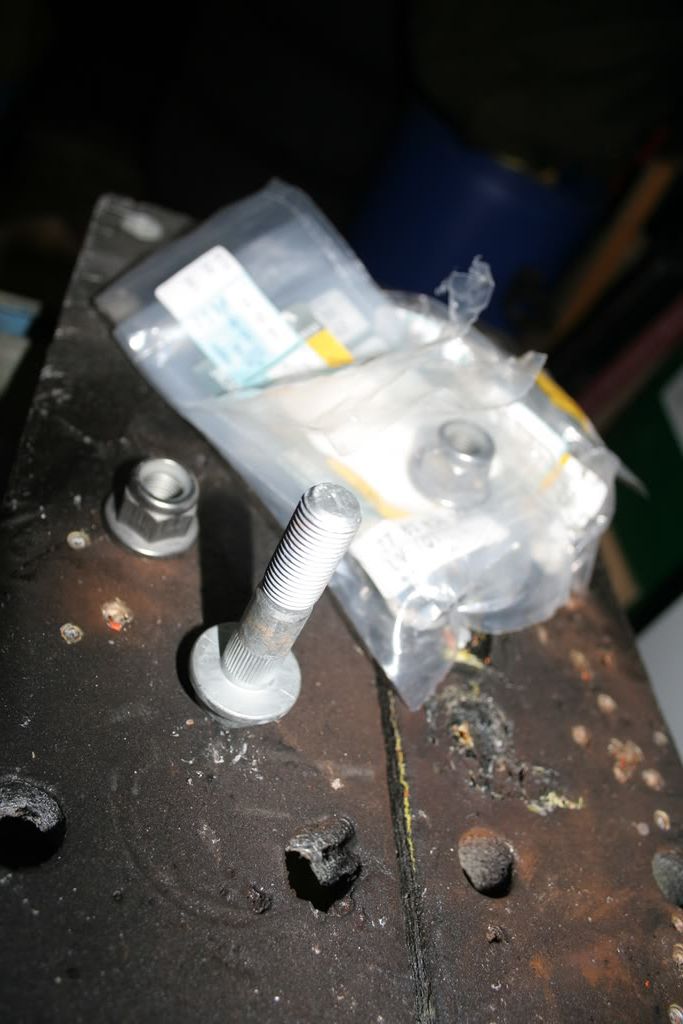
- 172/182 Hub Bolts + Nuts [Picture]
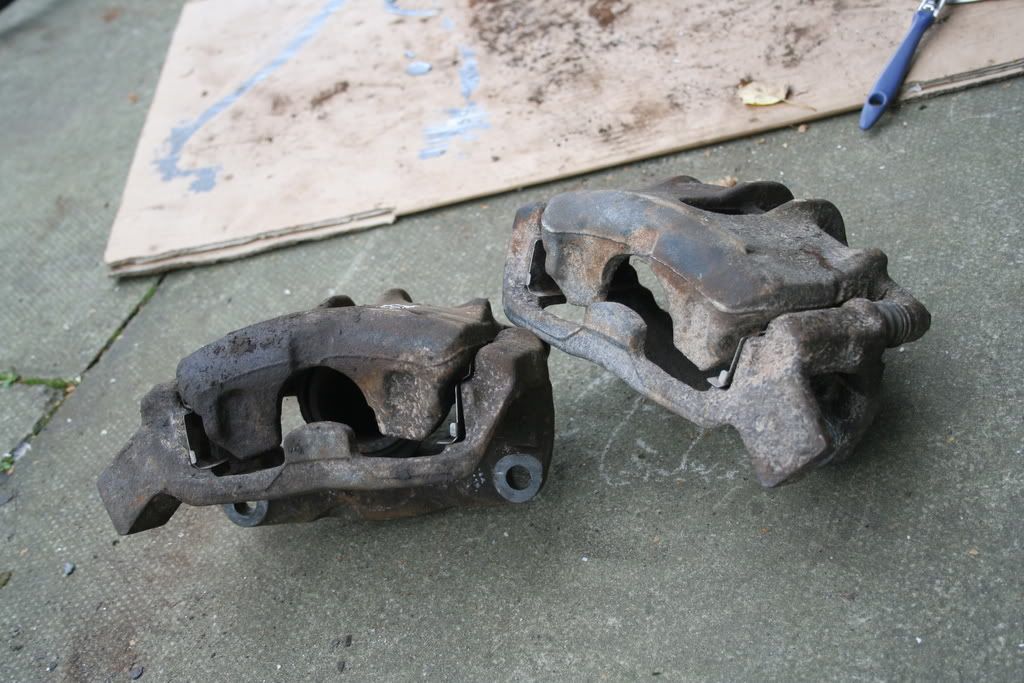
- 172 Ph1, Ph2 or 182 Brake Calipers (Including Hoses If Possible) [Picture]
- A Pair of 172/182 Brake Disks, 280mm.
- A Set of 172/182 Front Brake Pads
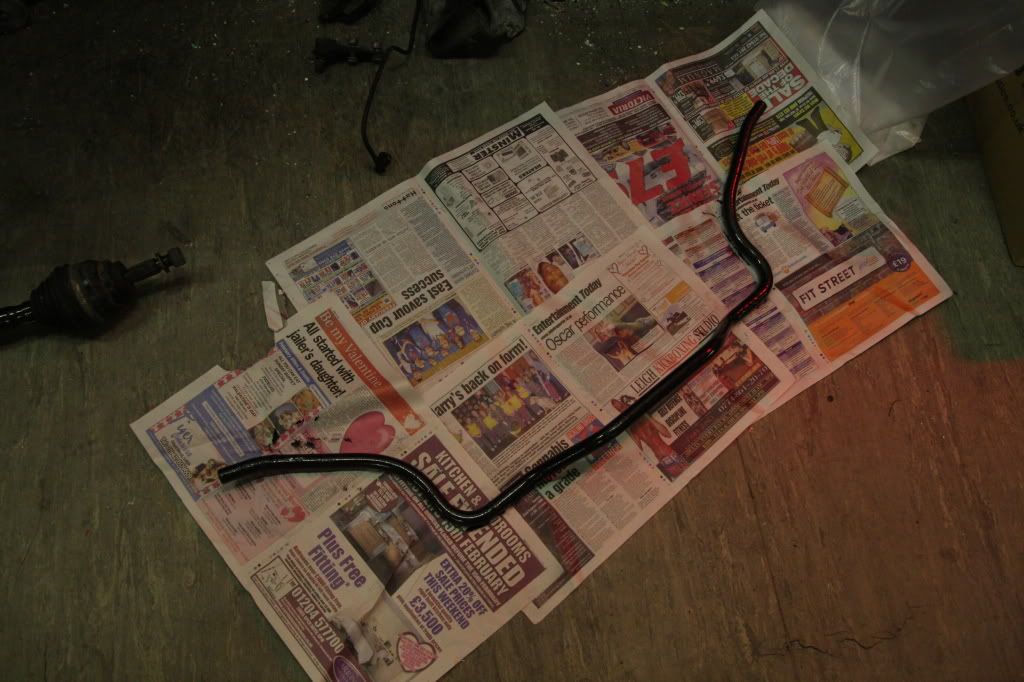
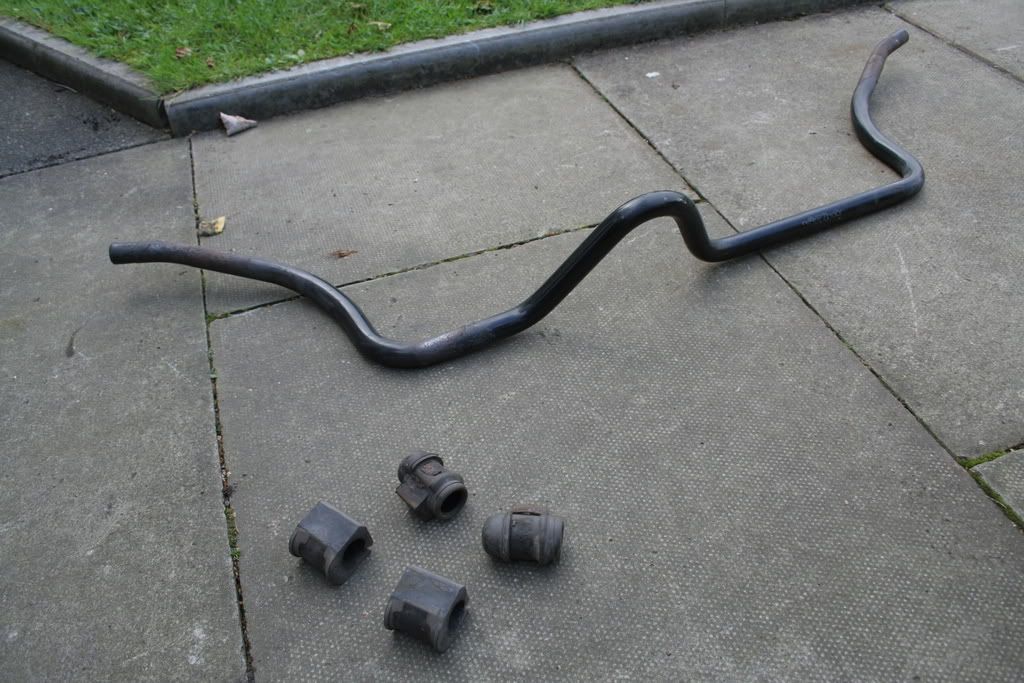
- Williams Anti Roll Bar [Picture]
- Williams Shocks (Can Be Coilovers, Standard Shocks, As Long As They Are Williams Fitment) [Picture]
- Williams Steering Rack (Read Below For Info Regarding Why This Is Needed)
Why Do I Need A Williams Steering Rack?
- R19 16v Wishbones
- 172/182 Anti Roll Bar [Picture]
- Valver Shocks Of Any Type
A lot of people that fit Williams widetrack onto their Valver just simply wind the track rod ends outwards to make them longer, so they meet up with the hubs and the wider track. Whilst this is ok on the Williams widetrack setup, we hit a problem with doing it on a 172 widetrack setup as it is wider than the Williams. The track rod ends will not physically wind out far enough to meet the hubs without falling off and/or just being plain dangerous.
A Williams steering rack is wider from factory, to meet the extra width of the williams track. This is ideal for 172 widetrack users as once fitted, the track rod ends can just be wound out as described above, but because the arms on the rack are longer, there is no danger of them being too short.
Williams steering racks are power assisted, and will straight swap onto your valver if you are retaining the power steering setup without a problem. Its just as simple as connecting the hoses up. If you are not running power steering, its possible to pack the inside of the rack with grease and seal the holes, converting it into a 'manual' rack, but keeping the extra length on the arms to meet up with the 172 widetrack.
The other option is to remove the actual arms from the Williams steering rack (as this is the component that is longer), and fit them onto your current Valver steering rack. They are a pain to remove, but it is an option.
172 Widetrack Fitment
Now that you have sourced your parts, and know that you need a longer steering rack, its on with the fitting...
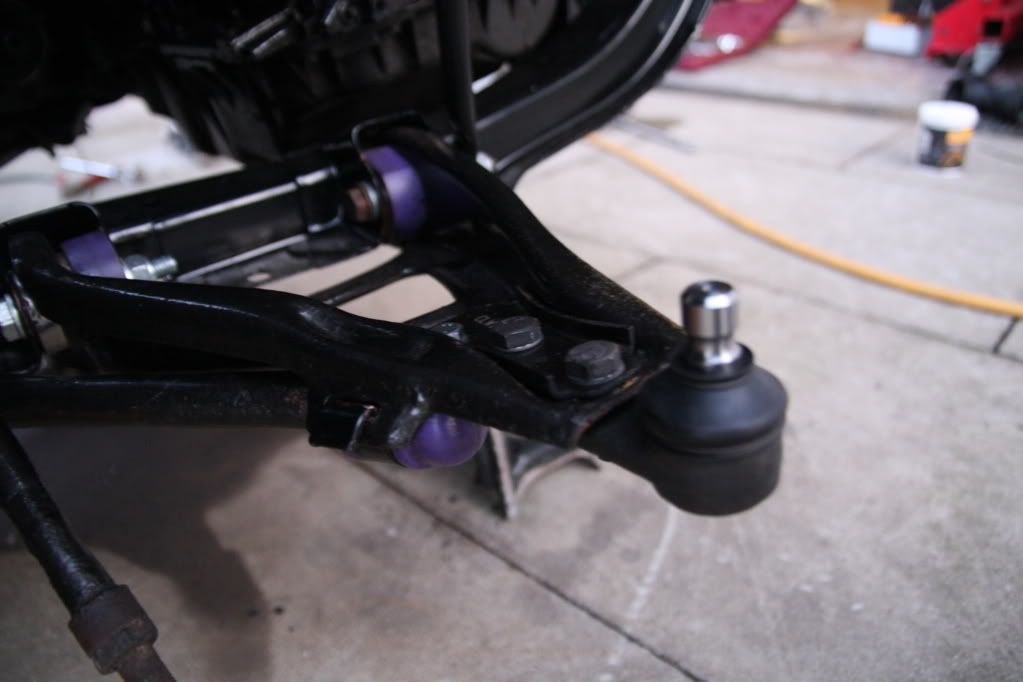
Before the hubs will fit, they need some machining. This is because the section of the hub where the shock bolts on is a lot fatter on a 172 than a Mk1, so some of the material needs taking off to let the Mk1 shock fit.
You need to remove 2mm from each side, 4mm in total.
Next, you will need to enlarge the holes on whatever shocks you are running by 1mm. This is so you can run the 172 Hub Bolts. If you did not run the 172 bolts, there would be space around the bolt where it goes through the hub, as the Mk1 items are not as fat. I am running coilovers with slotted holes, so I told the machine shop to remove 0.5mm from every edge of the hole, thus meaning the hole is technically 1mm bigger overall.
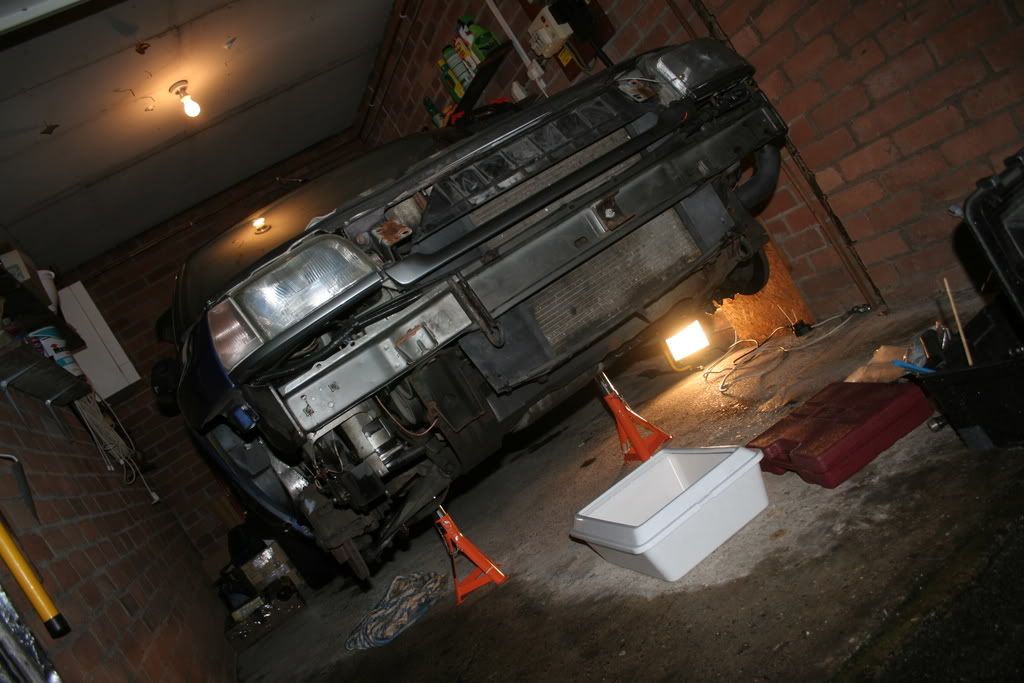
Now that the machining has been done, its as simple as putting it all together as everything will fit. It is all possible to do on the car, but I had the subframe off to be powdercoated so I took the pictures then...
If you dont already have the correct steering rack as desribed above, you will need to change it. It is alot easier to swap the rack with the subframe off the car, but doable with it on if you are patient enough.
Before you start, undo the top mounts (Soak them in WD40 beforehand if possible). They are known to be very tight, and usually need an impact gun to free them up. Also, dont go any further without loosening the hub nuts. Get someone to press the brake while you remove the nut, it should come off easily enough. Before you carry on, make sure you have drained the gearbox oil, as you will be removing driveshafts and you dont want the oil going everywhere.
Draining Gearbox Oil:
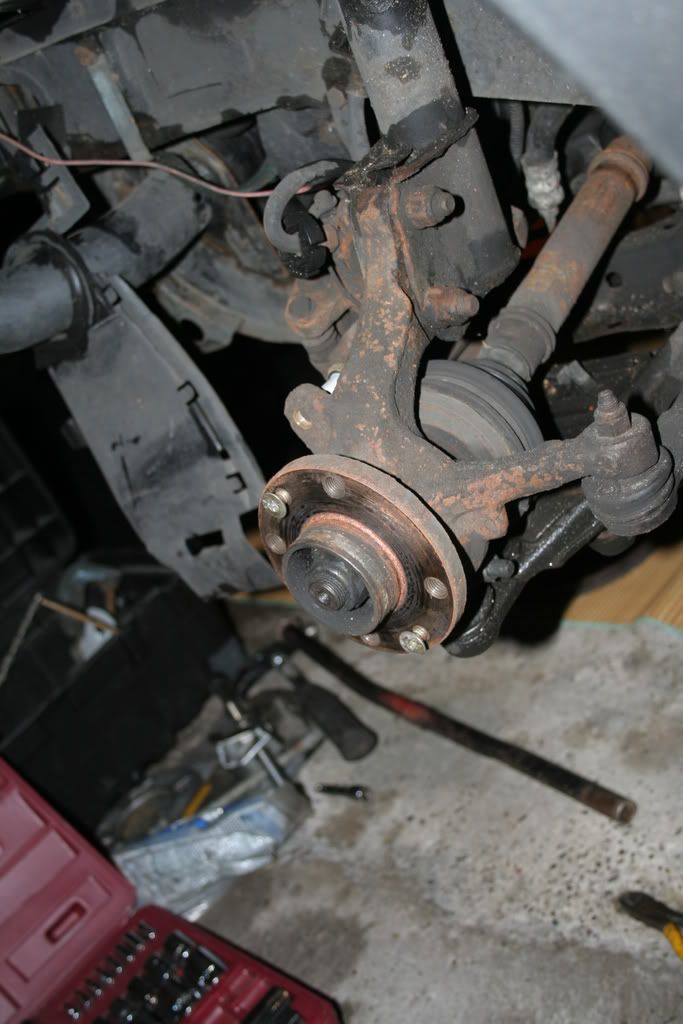
Once you have done that, you can get on with removing the rest of the Valver items. Remove the shock bolts, and then the top mounts completely to get the shocks out of the way. Undo the caliper from the hub, and leave it hanging for now so you dont get brake fluid everywhere. Then undo the track rod end from the hub, so its no longer connected to the steering rack.
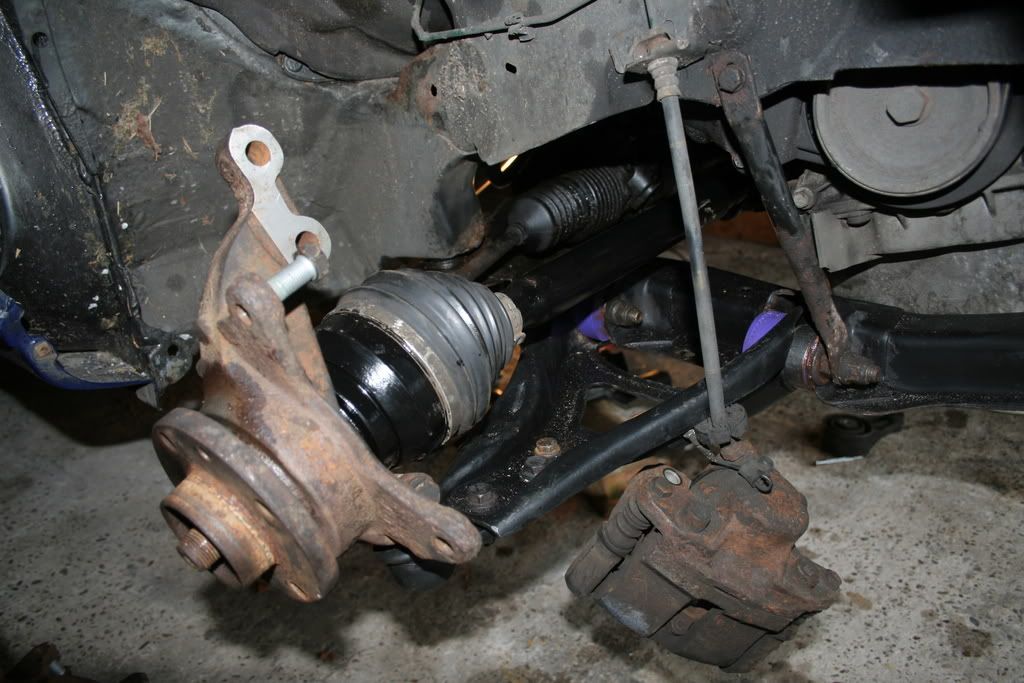
Disk and Caliper Removed:
You can now undo the two wishbone bolts on each side, holding them to the subframe. Slide the hub off the driveshaft, and the wishbone can then be removed with the hub still attached, saving a bit of time. Undo the 3 bolts holding the nearside driveshaft into the gearbox casing, then pull the offside shaft off the spline (Sometimes the offisde shafts have a roll-pin through the shaft on the box end, so this will need removing before it will slide off).
Now is the time to swap the steering rack if thats the way you are going to do it. Drain the power steering system if you have it, so you dont get fluid everywhere. You can then undo the two pipes, which will just connect onto the Williams rack if you are keeping the power steering. Remove the rack by undoing the bolts on the back of the subframe holding it on. If I remember correctly it will have to come out of the drivers side.
As I said, swapping steering racks is alot easier when the subframe is off the car, if you wish to do that, simply undo the two pipes from the rack to start. Then remove the rear engine mount and gear linkage, along with the manifold downpipe, and undo the 4 bolts holding the subframe to the car. The subframe will then drop and you can swap the steering racks.
Next you can begin fitting the 172 parts:
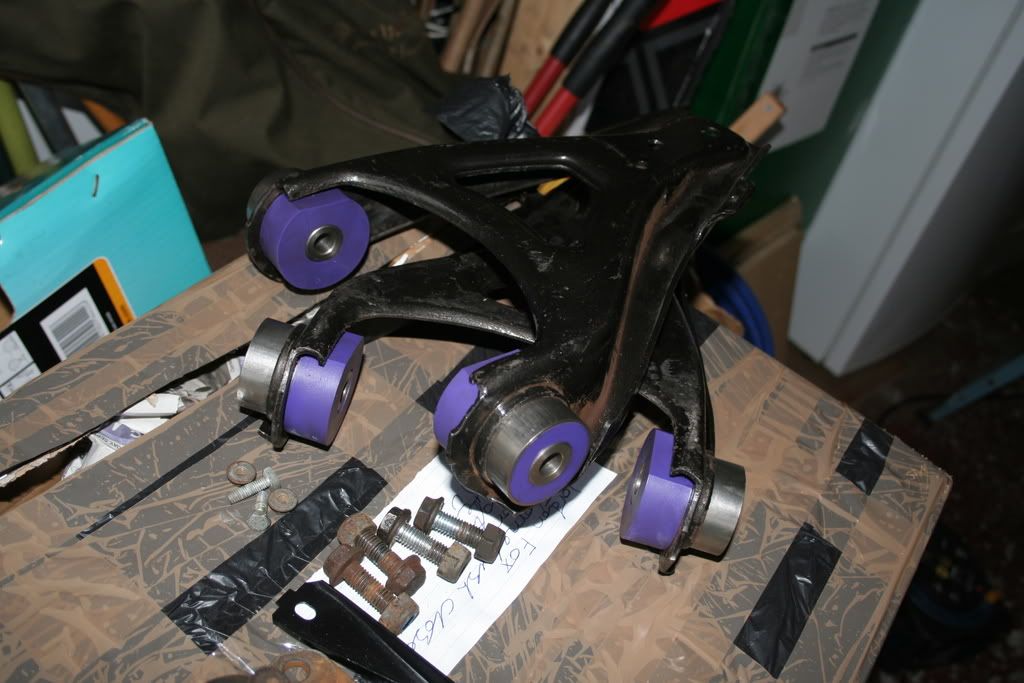
Now is the time to fit polybushes to the wishbones and anti-roll bar if you want to. It saves removing everything in the future to fit them if you decide you do want them.
172 Wishbones and Anti Roll Bar Fitted:
Once the wishbones and anti roll bar have been fitted, I would recommend that you fit new bottom ball joints onto the wishbones... As far as I know they are the same on all Mk1s, Mk2s, Old Shape Meganes and Scenics... I got them from a local motor factors, who supplied them easily enough (Around £12 for the pair).
Next, fit the driveshafts on both sides. Your gearbox should have no oil in it from when you removed the old driveshafts.
Nearside Driveshaft (172 Ph1 In My Case):
Offisde Driveshaft (172 Ph1 In My Case):
You can now fit the hub, slotting the driveshaft through it. Tighten up the hub nut.
You can then fit the shock and top mount. Once that is all bolted together, you can connect the track rod end from the steering rack onto the hub.
Now that the hub is physically bolted into position, you can fit the disks, pads and calipers. Ideally make sure you swap the brake hoses for R19 16v items, or 172 items, as they are longer and will not stretch on full lock. I am personally running R19 16v Goodridge Braided Lines, which are perfect.
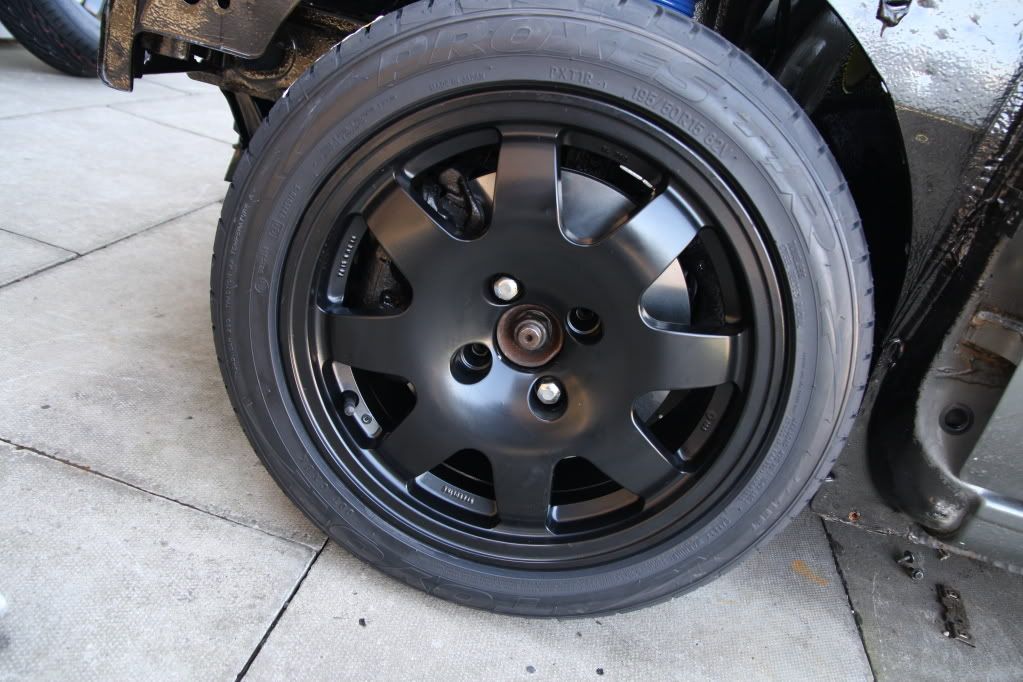
View of the 280mm disk and caliper behind a Williams Wheel...
You will obviously need to bleed the brakes once you have fitted the calipers. Also, dont forget to fill the gearbox oil back up once the driveshafts are fitted and everything is assembled.
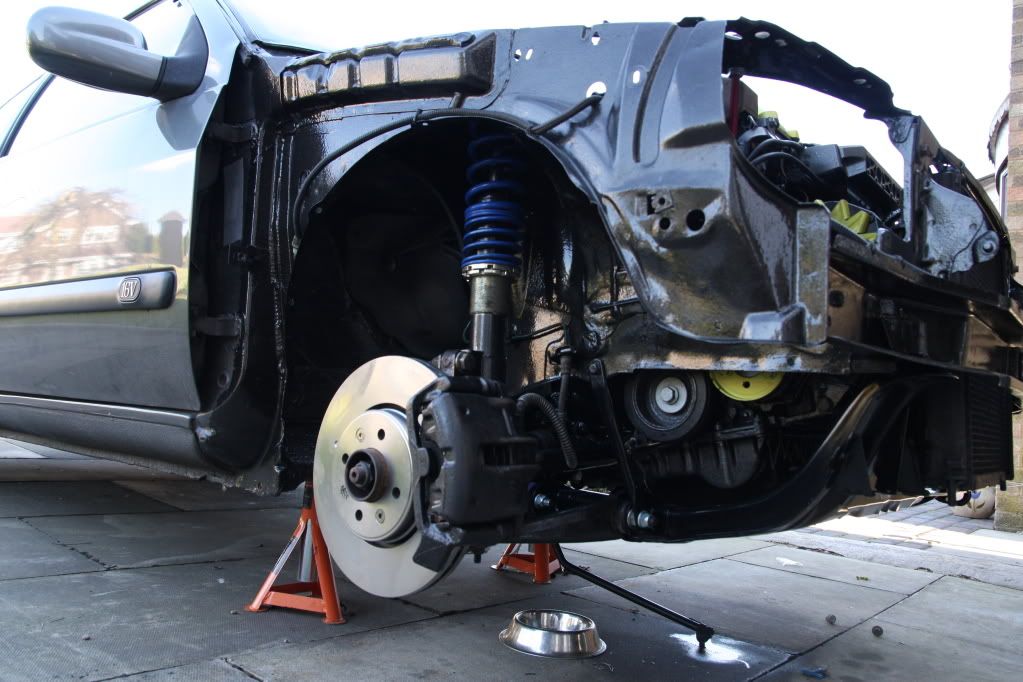
Thats all there is to it really, you should now have the 172 widetrack fully fitted, just make sure you get the tracking done. I opted to run coilovers so I could adjust the camber and height of the front, so the wheels would miss the arches, considering the track is wider than a Williams.
There is probably quite a few points ive missed with regards to the removal of the standard valver parts, but the guide was really just meant to show how the 172 widetrack fits.
I have included a few pictures below so you can see how wide the track looks when fitted:
And it also makes for great handling, as the Williams is known to be with its wider track:
Hopefully this guide has explained what fits, and what dosent, with regards to the 172 Widetrack. If you have any questions about the 172 Widetrack fitment, or this guide, just drop me a private message on here!
Mes soupçons se confirment....mcossie a écrit :les cardans de RS ne sont pas trop longues dans le montage avec pivots RS bien sûr ???


